Peter Mar's Web Site |
||||||||||
Overclocked Core i7 2600k Computer |
||||||||||
The finshed computer |
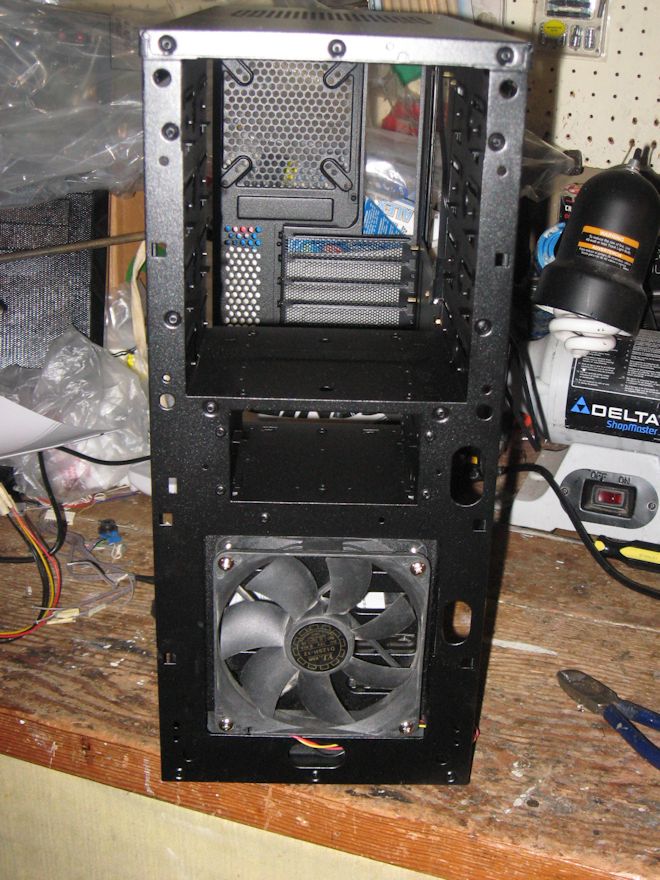
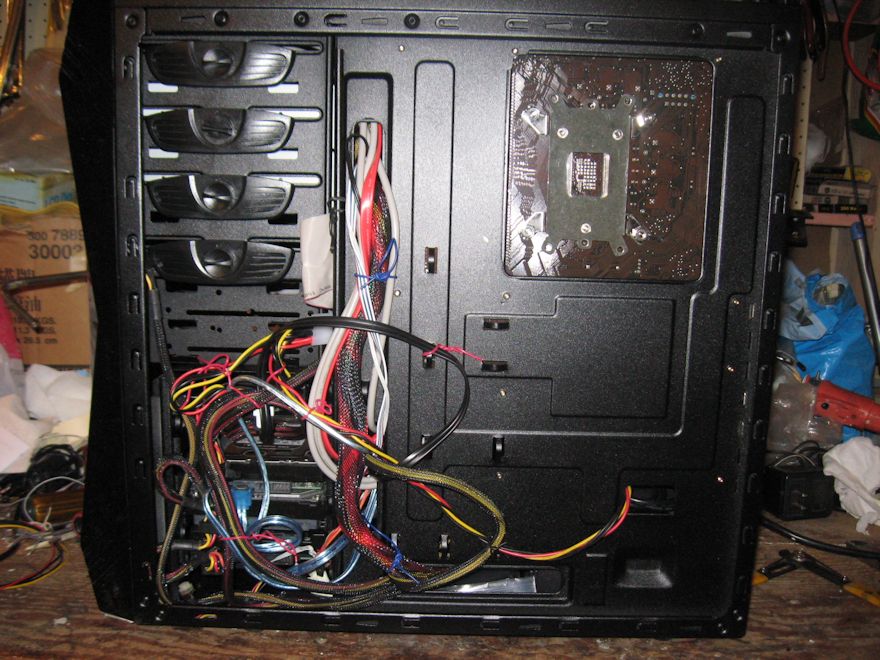
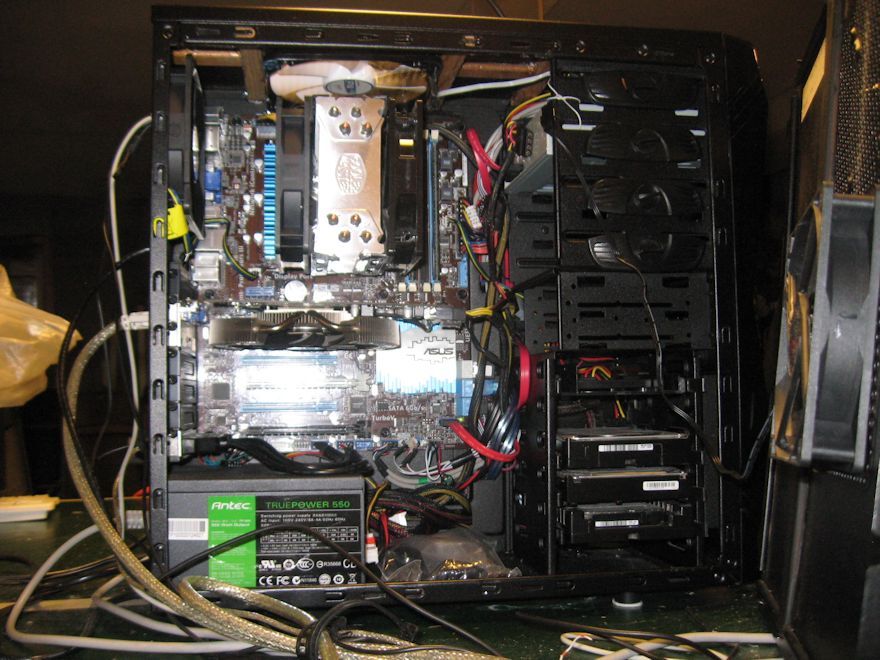
I decided to upgrade my computer with a brand-new motherboard, a new much faster video card the and a larger computer case while keeping the same Core i7 2600 K CPU that I had for over a year and a half. Everything else was carryover from my former build. The reason for this is to unleash the full potential of this unlocked CPU. The old computer case was was reused to house the next slower computer which is now designated as Marcomputer4 which contain the Sandy Bridge core i3 2020 CPU clocked at 3.3 GHz. This new motherboard replaced the Asus P8H67M Pro CSM which does not allow any multiplier overclocking. The Sandy Bridge processor and newer does not really allow BCLK (system bus speed) overclocking very much. This is because, you would also overclocked PCI express bus and other input output which throw the timing off. In most cases, for Sandy Bridge processor the maximum bus speed overclocking is only up to 103 from default of 100 MHz. For the Ive Bridge processor, the maximum that you can run it is a little higher at 105 MHz. For a computer case that which provide plenty of ventilation to allow easy overclocking I’ve decided on using the black Rosewell Challenger computer case. It came with three fans, a 120 mm fan on the front that has blue LED lights, 120 mm one in the back plus a 120 mm on the top of the case. I only use the fan in the back remounted on the lower side panel on the left as intake fan to help cool the graphics card. The interior of this computer case is also painted in matt black finish with rolled edges. For both the front intake fan and the back exhaust fan as well as the suction fan for the CPU cooler, I’ve purchased three Cooler Master Blade Master 120 mm 2000 RPM PWM fans. These fans are quite similar to the one on the CPU cooler Cooler Master hyper 212 EVO. For the fan at the top of the case I’ve purchased the 140 mm Arctic F-14 PWM 1300 RPM high-performance case fan. The CPU cooler, Cooler Master hyper 212 EVO which was carryover from my former build with another fan added. The computer case is fairly large but nice-looking. The top of the computer cases little flimsy so I glued on some wood strips to help reinforce it. I’ve also glued one down the middle of the side panel on the left. This computer case utilize tool less drive mounting although being windowless it does allow for fair amount of cable management underneath the right side cover. The power supply is mounted on the bottom with the power supply intake underneath through a removable mesh filter. There are five hard drive bays plus a plastic tray for two, 2 ½ inch hard drive or SSDs which you can mount on any of the five drive bays. They are also 3 optical drive bays that are tool less with one internal one above. As well as two floppy drive bays. Unfortunately the case that I bought does not have front panel USB3 ports but only two USB 2 ones instead. They do carry the newer exactly identical model that substituted USB3 ports that connects to the motherboard header for additional $10 more. This computer case front panel as well as the back is constructed mostly of black steel mesh to allow for good ventilation. Since I did not use the blue LED fan for the front and this case does not provide a power On LED, I had to add my own green LED connected to the motherboard front panel header. After shopping around based on price and performance for a motherboard, I chose the ASUS P8Z77 V LE Plus motherboard. Upon purchase, I also receive a 1600 MHz, 8 GB DDR3 memory module for free. The memory module I’ve received was the extremely slim Crucial Ballistic BLS8G3D1609ES2LX0 (649528762863) 8 GB DDR3 1600 CL9 Memory. It also operates at a fairly low voltage of 1.35V as well. In order to have the full 16 GB, I’ve decided to purchase an identical one. Using large fans in my system, I’ve notice that my old graphics card fan was making more noise than I like, so I decided to replace my graphics card as well. For the replacement, I’ve purchase the MSI N460 GTX SE Video Card. This video card overclock very well when using the downloaded utility provided by MSI. It’s the MSI afterburner utility. This is in sharp contrast to my former Nvidia GeForce 9600 GT graphics card that doesn’t actually allow much overclocking without crashing. After overclocking, this new card provide approximately 4 times the performance. The nice feature about this card is that even when overclocked, the temperature remains fairly low at about 60°C. The fan on this graphics card is fairly large at about 90 mm with heat pipes. For the new video card MSI N460 GTX SE, I’ve use their overclocking software to overclock both the memory and the CPU speeds. The default speed was: memory speed at 1700 MHz and the GPU speed was at 700 MHz. The safe top speed that I was able to use is at: memory speed is set at 2000 MHz and that GPU speed is set at 850 MHz. On the software, I have the setting in four settings steps. Under step one the setting is 1900/801 MHz. And under step two the setting is 1950/825 MHz. And under step three the setting is 1975/835 MHz. And under step four the setting is 2000/850 MHz. Even at the maximum speed chosen, I did not have to increase the GPU or the memory core voltages. This software will run on most video cards of other brands as well. Most of the time, I only use the settings provided under step two. This video card is fairly quiet even when overclocked. It does produce a little bit of the high pitch whine under extremely intensive graphics load. The new ASUS P8Z77 V LE Plus motherboard makes it possible for me to overclock my Intel core i7, 2600 K CPU up to 4.9 GHz. This motherboard opened up the multiplier to a maximum of X 61 which makes it possible to go as high as 6.1 GHz while maintaining the standard 100 MHz BCLK frequency. Using the included automatic overclocking software it managed to automatically overclocked the system to 4.833 GHz. It set the BCLK frequency to 103 MHz and the multiplier to 47. The CPU core voltage was automatically set at 1.44V. For every day use, I’ve decided to go into the bios and use my own settings. I felt that the CPU core voltage was set automatically too high. The settings that I chose is: The multiplier is set at 45. The BCLK frequency set at 100 MHz. The CPU core voltage set at 1.275V to arrive at 4.5 GHz. This is my new default setting for this system to run at boot up. Using the Asus provided utility software AL Suite 2 under Turbo V, I’ve set up three settings one which is an under clocked at 3 GHz and two overclocked settings at 4.8 and 4.9 GHz. For the 4.8 GHz, I had the CPU core voltage set at 1.34 V and for the 4.9 GHz it has a setting of 1.365V. For the under clocked setting the CPU core voltage is set at 1.15V. The computer is very stable with any of these settings. Initially when running under the automatic overclock setting with only one fan on my CPU cooler, the CPU core temperature reach 88°C on the hottest core running at 100% CPU load. With two fans on my CPU cooler and with my own revise settings running at 4.9 GHz, the resulting temperature was 10°C cooler at 78°C running Prime 95. At the 4.5 GHz setting, the peak temperature was 62°C running Prime 95. This motherboard offers a lot of nice useful features such as a total 4 PWM fan headers that works with fans that have PWM or not. My installation include a fan that came with the case re-mounted on the side panel that only has a plug with three terminals. Yet, this motherboard is able to automatically control this speed of this fan. It's connected to the extra plug on the top fan the140 mm Arctic F-14 PWM 1300 RPM high-performance case fan in parallel sharing the same fan header. This motherboard also provide rapid charging on devices pluged into the USB3 ports as well as USB3 Boost with speeds up file transfer on compatible devices. All four fan headers are speed controllable either automatically or manually control from the utility program as well as in the bios. On the back panel there is one eSATA port. On the motherboard itself there is an extra seventh SATA port does not very useful. When I hook up a hard drive to it and then booted up the computer it’s not recognize. But it does work when it comes to formatting a hard drive connected to it under DOS before booting into Windows. The eSATA port in the back works fine when it comes to accessing it under Windows. Both those ports are control using a third-party chip. The Intel Z77 chipset only has two SATA 6 and four SATA3 ports capabilities. All of the SATA ports controlled by the Intel chipset works great with no problems. This chipset also controls 4 USB3 ports two of which is on the back panel and the other two on the motherboard header next to the 24 pin power header. There are also 12 USB2 ports. Two on the back panel and the rest on the motherboard as 5 headers. The fifth and six USB3 ports on the back panel is provided by a third party Asmedia chip. It didn’t have any problem on the first boot up after completion of the installation. Even though the two motherboards have a different chipset. In order to make it compatible, I had to install new drivers from the motherboards DVD-ROM disc. The drivers on the disc are the latest ones. I went online and check the drivers that was offer at Asus and apparently they are the same ones on the disc. Even the bios on the motherboard are apparently are the latest one. Since I have the retail version of Windows 7, it was possible for me to reactivate Windows. Initially, I did have a little problem with activation but in a few hours time it was automatically activated on its own. I’ve decided to use the low profile Crucial Ballistic BLS8G3D1609ES2LX0 (649528762863) 8 GB DDR3 1600 CL9 Memory module provided to me free with the motherboard purchase instead of my old ones. This one operates at 1.35V instead of 1.5V of my old ones. When I first installed this one, the computer automatically use the 1333 MHz instead of the 1600 MHz setting. I had to manually go into the bios and use the correct settings. At default settings, the two memories uses the same timing. Only that the new one uses the default setting of 1600 MHz speeds and a core voltage of 1.35V. I had some feeling that this memory module is manufactured utilizing a die shrunk. This is because it operates at lower voltage. In order to have a full 16 GB total memory I went out and bought another identical one. Under benchmarking, I did notice an improvement in memory speeds as compare with the old one. The large CPU cooler, Cooler Master hyper 212 EVO only comes with one 120 mm fan but an extra fan brackets are included. For better overclocking I’ve installed an extra fan on the other side as suction. This CPU cooler is rather tall and only fits in cases with a width of 7 ½ or more. On my old case, I had to install a brace to bow the side panel in order for it to fit. For the second fan I use a Cooler Master Blade M aster 120 mm 2000 RPM PWM fan which is very much identical to the original fan on the cooler. In order to connect this fan to the CPU fan header, I had to fabricate a Y cable so that both CPU fans share the same fan header with only one fan being read for RPM by the motherboard. The rest of the parts are carryover from my former build and they are Intel Core i7 2600K processor, 32 GB Sandisk Ready Cache SSD to speed up loading, 300 GB Western Digital Velociraptor 10,000 RPM with 32 MB Cache hard drive as the boot drive, Western Digital Caviar Black (WD2001FASS) 2 TB SATA II Hard Drive for storage and the Seagate ST31000528AS (200001698397) 1 TB SATA Hard Drive for additional storage. With these upgrades, this computer is perhaps adequate for gaming as well. My only reason primarily was so that I can very quickly do video editing. My previous system using the Core 2 Duo, e 8500 wasn’t adequate enough for this job. It sometime would crash causing me to having to do it all over again. It did not happen with this system as well as the previous one using this Core i7 2600 K CPU. With this motherboard with the maximum overclock that I have set, produce a performance increase about 50% more than the previous motherboard that don’t allow overclocking according to some benchmark. Using the peak overclocking for the CPU as well as the GPU produce the result on Windows Experience Index of : CPU at 7.8, memory at 7.8, graphics at 7.8, gaming graphics at 7.8 and primary hard drive at 6.4. It seemed like, the lowest score is the hard drive. Without the caching SSD the score would go down to 5.9. Even using the fairly fast 300 GB Western Digital Velociraptor 10,000 RPM hard drive the score remains at 5.9. In order to improve the score, I would have to use a very fast SSD. The SanDisk caching SSD only improve my score by five points but noticeably reduced the boot time in half. Overall, I’m quite satisfied with the performance of this computer if I were to have to do this from the very scratch I would consider going with the latest Haswell socket 1150, fourth-generation Intel Core i7 system. Perhaps using the unlocked 4770 K CPU along with Z 87 motherboard.
|
|||||||||
 |
||||||||||
The 120 mm intake fan in the front |
||||||||||
 |
||||||||||
The left side of the case with only 2 hard drives installed out of the 4 |
||||||||||
 |
||||||||||
The cable management on the right right side |
||||||||||
 |
||||||||||
The back of the case showing the 120 mm exhaust fan |
||||||||||
 |
||||||||||
The completed system with 2 intake and 2 exhaust fans |
||||||||||
 |
||||||||||
| Home | ||||||||||
| ; | ||||||||||